The most important tool for every hacker, programmer and forensics expert is nothing other than-Linux. Linux's distros are used in forensics, checking bug in program, networks or system. Its well used from time before till now. Soo for every hacker needs it.
Since it is developing OS for Computer especially for laptops , from before some year it begins to develop OS for Android too.. It can now be more usefull and handy because we can take it into our mobile wherever we want.
Soo today's article is all about how to install Kali linux in Android in Linux Deploy.
First of all these conditions are to be checked or fulfilled before proceeding ahead. :
*.A device running Android 2.1 and above, rooted.
*.At least 5 GB free space on internal or external storage.
*.A fast, wireless internet connection.
*.Patience to wait for a distribution to bootstrap from the network.
*.Rooted Android for full funcality
After having this in your hand we need to download Linux Deploy in Android. It acts as VMware for Android where you can install linux safely.
Download Linux Deploy from Here
Now Installing Linux is pretty easy in Linux Deploy.
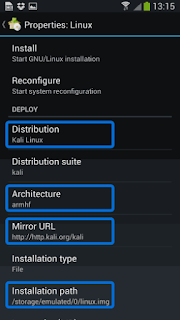
Do the setup as above. No any spelling mistakes should be done. By choosing Kali Linux in the “Distribution” tab, you’ve pretty much covered the important stuff. Optionally, you can choose your architecture, verify that the Kali mirror is correct, set your installation type and location on your Android device, etc. Generally speaking, the defaults provided by Linux Deploy are good to begin with.
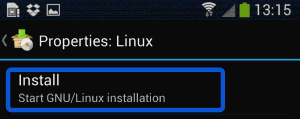
After hitting the “install” button will start a Kali Linux bootstrap directly from official repositories. The download depends upon your internet speed (will download Kali linux only - no tools).
Once the installation is complete, you can have Linux Deploy automatically mount and load up your Kali Linux cheroot image. This also includes the starting of services such as SSH and VNC for easier remote access. All of this is auto magically done by hitting the “start” button. You should see Linux Deploy setting up your image with output similar to the following:
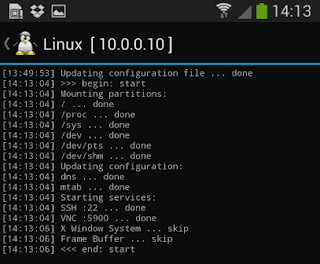
At this stage, Linux Deploy has started a VNC and SSH server inside your chrooted Kali image. You can connect to the Kali session remotely using the IP address assigned to your Android device (in my case, 10.0.0.10).
Now you can use either a SSH or VNC client to access your Kali instance. The VNC password is “changeme” and the SSH credentials are “android” for the username (configured via Linux Deploy) and “changeme” as the password.
muts@slim:~$sshandroid@10.0.0.10android@10.0.0.10 password:Linux localhost 3.4.5-447845#1 SMP PREEMPT Fri Apr 12 17:22:34 KST 2013 armv7lKali GNU/Linux1.0[running on Android via Linux Deploy]android@localhost:~$sudosuroot@localhost:/home/android# dfFilesystem 1K-blocks Used Available Use%Mounted on/dev/loop34180944667268330401217%/tmpfs952708809526281%/devtmpfs95270809527080%/dev/shmroot@localhost:/home/android#root@localhost:/home/android# apt-get updateHit http://http.kali.org kali Release.gpgHit http://http.kali.org kali ReleaseHit http://http.kali.org kali/main SourcesHit http://http.kali.org kali/contrib SourcesHit http://http.kali.org kali/non-free SourcesHit http://http.kali.org kali/main armel PackagesHit http://http.kali.org kali/contrib armel PackagesHit http://http.kali.org kali/non-free armel PackagesIgn http://http.kali.org kali/contrib Translation-en_USIgn http://http.kali.org kali/contrib Translation-enIgn http://http.kali.org kali/main Translation-en_USIgn http://http.kali.org kali/main Translation-enIgn http://http.kali.org kali/non-free Translation-en_USIgn http://http.kali.org kali/non-free Translation-enReading package lists... Doneroot@localhost:/home/android#
If left unchanged, Linux Deploy will automatically set an image size of around 4 GB, for a “naked” installation of Kali. If you would like to install additional Kali tools down the road, you might want to consider using a larger image size, which is configurable via the settings in Linux Deploy.
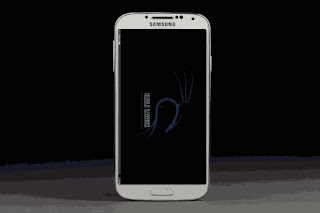
We had to try a couple of VNC clients to get one to work properly. Although controlling Kali through a local VNC client isn’t the most convenient of tasks, it certainly is possible. However, we suspect that most people will be SSH’ing into this instance. The picture below was overlayed with a Kali Linux desktop screenshot taken from a Galaxy S4.
Comments